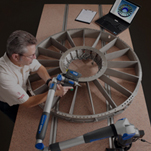
High-Resolution Structured Light Scanning – Blue and White Light Scanning
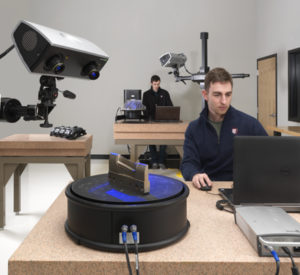
In addition to laser scanning, 3D Engineering Solutions supports precision structured light scanning for certain 3D digitizing and metrology applications. Structured light scanners use ultra-high accuracy/resolution optical imaging to triangulate points from multiple locations. By comparing millions of pixels, these structured light scanners can produce a more precise point cloud with a better definition of subtle edge features.
White Light Scanners
With structured white light, scans are typically accurate up to less than 0.001 of an inch. Structured light can capture a denser cloud of points than typical laser scanning. Structured light scans can be so accurate that this process is a popular choice when a near-exact virtual model is required.
For this reason, white light scanners are ideal for scanning components such as sheet metal parts, tools and dies, turbine blades, molded/cast parts, and intricate prototypes. And by using a non-contact process, data from white light scanners is collected efficiently with minimal setups.
Since the dense cloud of points captured by using structured light technology can be interpolated into a CAD model like other 3D digitizing methods used by 3D Engineering Solutions, our unique modeling expertise is key to harnessing this unique technology for your reverse engineering and metrology applications.
Structured Blue Light Scanners
3D Engineering Solutions also uses structured blue light technology to capture up to eight million data points in a few seconds.
Benefits of structured blue light scanning over structured white light scans include:
- Increased portability of equipment
- A longer-lasting light source
- Lower temperature influence due to the use of LEDs
- The ability to scan inside a well-lit room while filtering out other light sources
Will structured light scanning work for your project? Consult with the experts at 3D Engineering Solutions today.
High-Resolution Structured Blue Light Scanners
3D Engineering Solutions utilizes the most advanced systems for structured light scanning to perform service work for you. High accuracy combined with high resolution makes this 3D scanning technology an excellent choice for most reverse engineering and inspection needs.
Our entire staff of degreed engineers is fully trained in using this equipment to meet your project requirements.
Blue Light Scanner Technology and Blue Light Systems
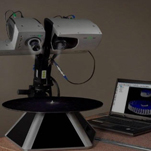
Blue Light is a version of this structured light scanning technology (White light scans can also fall under this technology umbrella). It operates by combining a projector, camera, and lens system to allow data collection. The projector creates a pattern of light and dark areas on the object being measured. The camera takes an image of this pattern overlaid on the object. The projector and camera are at an angle to each other. Because the angle is well known, the focal distance is well known and the distance between the camera and projector is well known, each pixel of the image taken can be triangulated using the pattern of light and dark areas to create a cloud of points. The pattern is typically straight lines or a well-known random pattern. Short-range laser scanning uses a similar triangulation method (without the light / dark pattern) to create a cloud of points.
This technology makes use of a lens to magnify areas of the object being measured. The effect is to focus all of the camera’s image pixels into a smaller or larger area of the object. This allows more detail to be captured in smaller objects and larger areas to be covered in large objects. We have a complete set of lenses for each of our systems to accommodate your specific project requirements. Our experienced engineers know the exact options to use for your project to yield the best quality data in the shortest amount of time.
The blue light resolution is excellent compared to other technologies such as laser scanning. The resolution is the spacing between point cloud points and is determined by the lens volume (the specific lenses used on the scanner) and the size of the camera in megapixels. This is opposed (and often confused with) accuracy which is the closeness of each measured point cloud point to the actual dimensional value. This excellent resolution allows for the recreation of very small details and is generally required for highly detailed reverse engineering projects.
Blue Light vs. White Light
The original version of this scanning technology employed a white light provided by an exotic bulb and is called ‘White Light Scanning’. These white light-generating bulbs have a relatively short life and can have decreased performance midway through their lifespan (they become less bright with use). With the advent of better sources of LED lights, it became practical to use LED technology as the source light for these light scanning systems. It was more difficult/expensive to create white LEDs for the White Light version of the technology and may be the reason that the blue color was originally chosen. The LEDs offer a much longer life and less thermal influence on the data than a bulb system. In fact, the manufacturer of the systems that we employ turned off the hour counter in their software used to help predict bulb life/failure for the original white light systems. We have been running our original LED Blue Light system since 2012 without any need to replace the light source! LEDs also have a better brightness consistency over their life. Between our units, we do not detect an intensity difference.
Another advantage of Blue Light over White Light is that it can be employed in any environment and under ambient lighting conditions. The lenses for the Blue Light systems are filtered to only look for the specific frequency of blue light from the system (laser scanning systems also employ this technology). White Light systems look for and are influenced by all light. So if the lab space is heavily lighted (like our inspection lab), this stray white light can wash out or affect the information collected by the system. Our systems are regularly used in heavy ambient white lighting and are not affected. Our systems are also portable and can be brought to your facility.
Blue Light Inspection
The data from blue light scanners yields a high-quality surface that is ideal for dimensional inspection. This information is kept by 3D Engineering Solutions and can be later used to extract further dimensions as needed. Data collected with Blue Light is covered under our ISO17025 scope.
Photogrammetry vs 3D Scanning
For your larger objects that require the benefits of Blue Light, we incorporate photogrammetry. We use coded and non-coded targets to establish a coordinate system to integrate the smaller images with the Blue Light Scanners. This allows us to take data on vehicle-sized objects and even larger ones. We could even use Blue Light to take data on your building – although you would not want to pay for it! (see our long-range laser scanning for that).
Traditional photogrammetry would otherwise only be used to take relatively low-quality surface data. This uses a digital camera and images taken from various angles with a scaling artifact (an object of known size) to create a data set. The resolution is fairly low and the accuracy is also low relative to Blue Light scans.
Practical Limitations of Blue Light 3D Scanning
No one instrument is ideal for every situation. At 3D Engineering Solutions, we have all of the modern advanced scanning technologies to solve your project needs. While Blue Light 3D scanning is ideal for many situations, there are a few that can cause issues/errors. Our staff of degreed engineers is fully trained to recognize and avoid pitfalls common with 3D scanners including these for Blue Light. As needed, we will recommend one of our other technologies such as CT Scanning or Laser Scanning.
Specular surfaces (highly reflective or shiny) can cause issues with data quality. To mitigate this a powder or water-soluble paint is applied to the object to make a diffuse surface (light scattering). This adds a layer of thickness to the part dimensions which can be as small as 0.0001” to as large as 0.0080” depending upon the material applied and the experience of the person.
Certain color ranges do not pick up well for Blue Light. Specifically, the color red tends to be filtered out. Use of a coating as described above can be used to mitigate this.
Error stacking can occur with Blue Light 3D scanners. Each image is taken separately from other images and then aligned through small paper targets or by shape matching. If the part being measured is significantly larger than the 3D volume of 1 single scan, the alignment between scans can be compromised. This is mitigated through correct sizing of the lens volume and cross-checks through other 3D scanner technologies.
Small features on large parts can also cause data issues. For larger parts, a larger lens must be used. These larger lenses effectively have a larger ‘spot size’ (the effective size of the pixel). If a pixel bridges a small feature, it is washed out of the image and will affect the accuracy of the 3D scanner’s process. This can be mitigated by using multiple lens volumes to capture the data and/or integrating data from other 3D scanner technologies.
Your project success is our mission. We have many years of practical experience performed by engineers who are qualified in each of the technologies that we employ. Contact us today to support your critical project needs.

