Ensuring Accuracy of Gages and Fixtures Through Accredited Calibrations

If we lived in a perfect world the parts you manufacture and the gages used to check them would both be exactly to nominal specifications. At that point a gage would be obsolete and so too would be the metrologist, but we all know that this world is far from perfect and that the best we can ever do in the study of measurements is to provide our best estimate of where the actual value lies along with a provision of uncertainty of measurement that can be traced all the way back to the international system of units.

Continue Reading

, , , , ,

ISO17025 Inspection Using Metrology CT

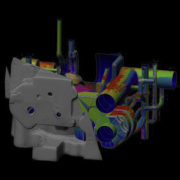
Industrial CT scanning has gained prominence in dimensional data collection technologies with the advent and continual development of additive manufacturing. Now, CT scanning processes are being added to ISO17025 scopes of accreditation and the emergence of Metrology based CT is gaining recognition and acceptance across many industries.

Continue Reading

, , , ,

Augmenting Structured Light System Data Sets with Alignments to Portable CMM Data Sets

Augmenting Structured Light

We often have to capture data for parts that have thin edges such as on turbine blades, airfoils, propeller cores, and many other items. This proposes an interesting problem, it is very common for these items to have tolerances that require them to be scanned using our structured light systems but wrapping data around these thin or “sharp” edges to bridge data from both sides of the part is very difficult.
Continue Reading

,

Seeing Your Part Through a Different Lens – Utilizing the Zeiss O-Inspect 863 for Optical Inspections Down to a Hairs Width

Utilizing the Zeiss O-Inspect 863_1

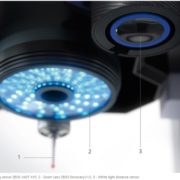
In the past year 3D Engineering Solutions acquired a Zeiss O-Inspect 863. The unit is a state of the art optical / tactile inspection system that adds to our scope of accreditation, for ISO 17025, a capability to measure parts on a scale that we were unable to accomplish prior to having this equipment.
Continue Reading

, ,

Effect of Tertiary Datum on Position Tolerance

Geometric Tolerancing

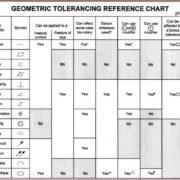
When doing a dimensional inspection of a machine part, the print often has callouts for position that use three datum, most often datums A, B and C. This ABC datum structure is the datum reference frame to which geometric dimensions and tolerances of the part are defined.
Continue Reading

, ,

Continued CT Services Expansion

Continued-CT-Services-Expansion

3D Engineering Solutions (3DES), North Americas’ most Advanced & Proven Center of Excellence For Metrology & Engineering Services is pleased to announce their ongoing strategic partnership with Nikon Metrology, Inc (NMI) of Brighton, Michigan. 3DES recently purchased two additional advanced industrial computed tomography (CT) systems from NMI. These systems use X-rays to penetrate components and assemblies to retrieve all surface and internal details.
Continue Reading

, , , , , , ,

3D Engineering Solutions Acquires FARO Focus S 350 to Improve Accuracy in Long Range Scanning Services

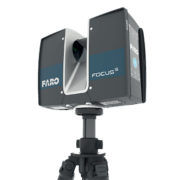
3D Engineering Solutions recently acquired the new FARO Focus S 350 long range scanner to compliment its growing customer demand for increased accuracy in long range scanning services. This new ‘best in class’ long range laser scanner offers outstanding features over the existing field of competitive equipment.
Continue Reading

,

Automotive OEM Service: High-volume & Certified X-ray Inspection

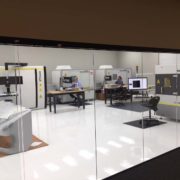
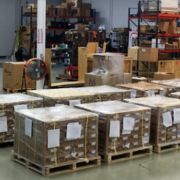
3D Engineering Solutions’ state of the art, temperature controlled, and ISO17025 accredited metrology lab offers certified digital radiography services. Our metrology lab and 30,000 sq. ft. of warehouse space can accommodate customer’s needs; from single part projects all the way up to production part projects for tens of thousands of parts. We have bar code logging capabilities for projects requiring full traceability and 100% data accountability.

Continue Reading

, , , ,

Presentation to ASNT, January 27, 2015

The American Society For Nondestructive Testing (ASNT) is the leading technical society for nondestructive testing professionals. I am honored to have accepted an invitation to present to the Central Ohio section later this month.

The topic of the presentation is, “Precise Non-Destructive Inspection of Complex Parts and Assemblies with Inaccessible Internal Cavities“.

Date: January 27, 2015
Time: 5:30 pm – 7:30 pm
Cost: Free (food and light refreshments will be served)
If you plan to attend, please contact Jing Ma, Central Ohio Section Secretary, to make a reservation or for more information. All reservations are final on January 25.

A First in Industrial CT Scanning Services

Historical Digital Archiving Pocket Watch
We have been talking about our new industrial CT scanning services over the last few months, and now have great news to share. 3D Engineering Solutions is the first company in the world to receive an ISO 17025 certification for industrial CT scanning services. This means that internal and external elements of an assembly can be scanned and analyzed with intense precision, like no one else can.

Continue Reading

, ,