Can you Measure a Gap in CT that is Smaller than the Voxel Size of the Scan?

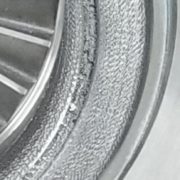
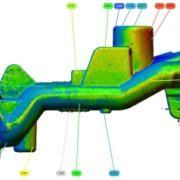
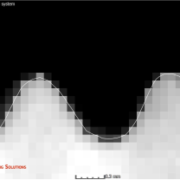
A common question that we are asked is: what is the resolution of a CT scan for determining gaps or voids or true surface locations?  We are also asked:  How can you measure a gap between two parts that may be closer than 1 voxel in size?  The answer lies in sub-voxel surface determination and in the number of voxels that are involved and continuous surfaces as detailed below.

Continue Reading

, , ,

Using a Hybrid Approach to Additive Manufacturing Metrology – CT – CMM

Modern Additive Manufacturing (AM) methods often employ subtractive machining to achieve precise dimensional and surface finish characteristics.  This is due to current AM limitations in build precision and surface quality.  These hybrid AM / subtractive components also demand a hybrid approach to measurement.  Internal features on AM parts are difficult or impossible to non-destructively measure using solely traditional metrology methods and so industrial computed tomography (CT) must also be employed.  CT scanning not only allows for precise measurements using metrology CT, but allows for detection of internal defects that are not otherwise able to be seen.  However, well machined portions are best served through other measurement methods due to precision requirements and data characteristics. This can necessitate a hybrid measurement approach.  However, traditional CT scanning and service providers are not trained as metrologists and do not follow particular standards related to metrology – especially ISO17025. Also complicating measurement is the design and datum reference frames used for additive parts that typically follow a traditional machined component print layout.  A layout method following best practices from the casting industry is suggested here. This article explores the methods (GD&T), issues, limitations and current solutions associated with good metrology practices for AM and hybrid AM components.

Continue Reading

, , , ,

How to Handle Quality and Inspection Requirements in Uncertain Times

COVID 19 has literally shut down a majority of the world’s production. As we have talked with our customers over this time, we have found that many have reduced their workforce or have implemented rolling furloughs. The problem is that once you let that skilled person go, they may actually find other work before you can hire them back. So, all of the training that was invested in them is gone. This seems especially true of Quality staff. During each normal business cycle and when things get tight, the quality staff is the first to be reduced. A new staff is then later brought on once the cycle has completed with the requisite experience or they are slowly trained up to a proficient level. This is logically the case as production requirements are lower during these cycles and removing production personnel would immediately and directly hamper the ability to generate revenue.

Continue Reading

, , , ,

Ensuring Accuracy of Gages and Fixtures Through Accredited Calibrations

If we lived in a perfect world the parts you manufacture and the gages used to check them would both be exactly to nominal specifications. At that point a gage would be obsolete and so too would be the metrologist, but we all know that this world is far from perfect and that the best we can ever do in the study of measurements is to provide our best estimate of where the actual value lies along with a provision of uncertainty of measurement that can be traced all the way back to the international system of units.

Continue Reading

, , , , ,

Utilizing Computed Tomography (CT) for Printed Circuit Board (PCB) Inspections and Reverse Engineering

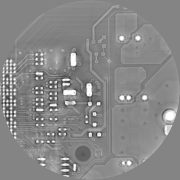
3D Engineering Solutions has expertise in inspection and reverse engineering for many different applications.  We combine the best available equipment and a well trained staff to deliver correct results in a rapid manner.

For PCB’s, we use the Nikon X-Tek 160kV Industrial CT Scanner which is designed to meet every need related to the inspection of PCB’s.  It provides up to 160kV and 20W power, a 1µm X-ray focal spot size, and a magnification range of 2x-600x. The detector can also tilt to a max angle of 75° which provides extra flexibility in examining multi-layer boards.

Continue Reading

, , ,

What Data Collection or Scanning Equipment and Technology is Needed for My Project?

Augmenting Structured Light

Many measurement and reverse engineering requirements require more than simple caliper or micrometer measurements.  Whether you are conducting a First Article Inspection (FAI), troubleshooting a manufacturing issue or reverse engineering a legacy part for improvements, one or multiple of the modern data collection methods may work – but what is best and what are you compromising on by using any particular method?  Do you do this work yourself or hire out an experienced service provider?

Continue Reading

, , , , , , , , , , ,

Common Non-Contact Measurement Devices and Methods

Non-contact or touchless dimensional measurement devices are the modern new comer to an array of contact devices that have been traditionally used.  Contact devices are discussed in this link on Common Contact Measurement Devices.  All of the non-contact devices generate a point cloud or voxel data set as their most raw form of data.  The exception is the optical comparator which has been around since the late 1920s.  It does not expressly produce digital data, but some of the variant equipment that evolved from this equipment does.

Continue Reading

, , , , , , , , , , ,

How is the Accuracy of Industrial CT Scans Verified?

Industrial CT scanning continues to gain popularity for use in measurements.  The real question to be asked is:  Is the data extracted from CT scans accurate?  Since its inception, CT scanning has been used to visualize internal structures from people to industrial items.  It is unparalleled in its ability to see those things that are hidden inside an assembly.  It is also important for measuring the effects of an assembly in its assembled state.  Using CT data to provide accurate measurements has always been around but there was no universally agreed upon ways to ensure the validity of the measurements.

Continue Reading

, , , ,

ISO9001 vs ISO17025 vs AS9100 – Why It Matters When It Comes To Your Metrology Needs

Every day, we in industry find ourselves in need of verifying the parts we have designed and built. Part of this verification comes in the forms of physical testing, as well as measurement and analysis. Whether you are looking at a prototype component or have a need to create an inspection plan for a production component, you will need someone who is proven capable in the science of measurement, otherwise known as the field of metrology. A simple Google search will reveal that there seems to be no lack of companies offering the services of metrology.

Continue Reading

, , , ,

How accurate is a CT scan? – Computed Tomography and Metrology

Metrology Grade CT Scan

Since shortly after X-Rays were discovered in 1895 they have been widely used in many diverse applications. The medical field was an early adopter of this technology, using X-Rays throughout the world within the first year. As it developed in medicine other uses emerged on the industrial side.

Continue Reading

, , , ,